Building an MQTT connected Tardis
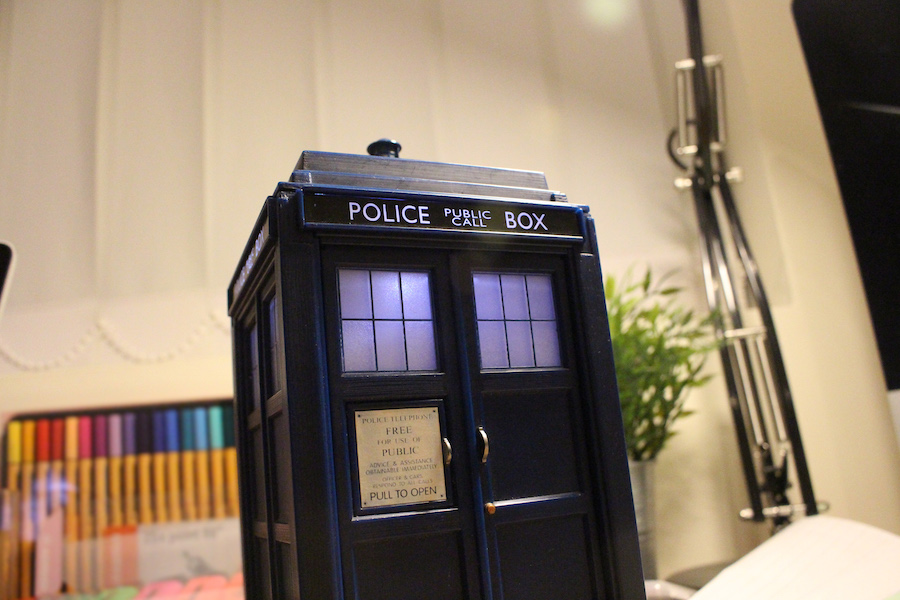 After coming home from University last Christmas, I saw my childhood Tardis sat on my desk disused and thought, I’m a CS student - I can build something cool out of that. Using NeoPixels, an ESP8266 and MQTT, I did.
Tech Choices
The first thought was how was it going to work, batteries were out as it used to devour them three at a time, so USB power was the obvious choice due to its ubiquity (and who doesn’t have a drawer full of adaptors).
As for the module inside, initially planning to use a Raspberry Pi Zero as I’d used previously had experience scripting on it. But improperly turning off a Pi could corrupt it’s SD - as it’s a full-fledged Linux OS on an SD card. For this project, I needed something that I could flash and restart freely as well as use minimal power, so I chose the ESP8266. After playing with various languages for the chip, I settled on MicroPython as the most familiar to me (as I’ve worked with it on a BBC micro:bit before).
Getting Parts and Building
 I picked up another Tardis from eBay for around £20, as I wanted to keep my one as a reference (just in case I couldn’t get it back together), an ESP8266 an RGB LED and an LED strip, when it arrived I started prototyping with my breadboard, building a working version with the RGB strip broken into 4 sections around the interior of the roof and the separate LED in the lamp.
I had a fully working prototype after cooking a few ESP8266’s, experiencing some horrible smells of electrics burning and learning some electrical lessons the hard way (if only I had my electronics module a year earlier!)
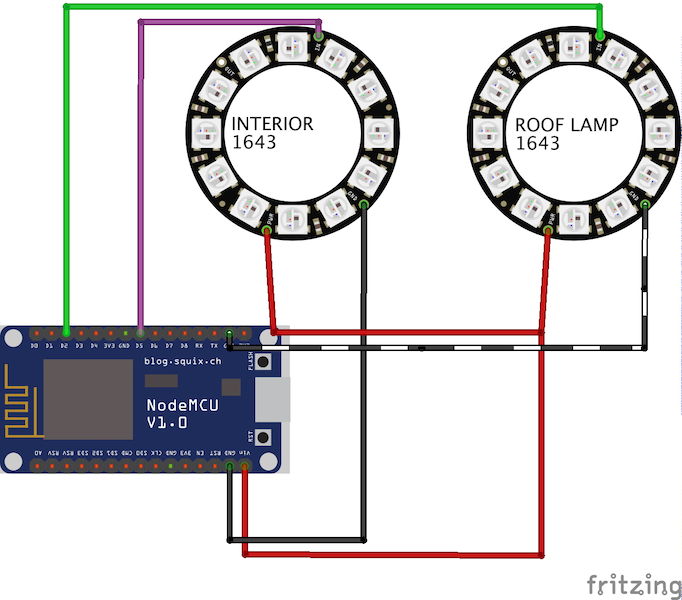
When I measured up to fit everything back in the Tardis though and reassemble, I realised that my cable loom would be too big to actually fit in the box and I started thinking about alternate ways to do this.
At a Hardware Meetup last Spring there was a lot of excitement around NeoPixels and after buying some and playing with them - they’re pretty cool and far better than my previous LED strip to light the inside as LEDs can be controlled individually meaning that they can be used for patterns.
I built the circuit instead as can be seen on the right, which allowed me to only need to run 5 cables up to the roof which was more easily done and meant I could more easily reassemble after.
Software Side
There’s more information about the firmware on the Projects page (and on GitHub), but the ESP8266 ran MicroPython and connected to a remote server using MQTT and fetching various commands from there allowing notify50,50,50, lamp50,50,50, interior50,50,50 allowing notification lights, lamp flashes or interior colour changes based off the command and HEX colour value. I’m intending to implement this within Home Assistant to allow colour changing from Apple’s HomeKit and Alexa too.
Final Product
I’m really happy with what I made and the final product and the functionality that it has, and it’s a nice extra bit of Smart Home technology for me to light my room, as well as serve notifications in an eye-catching way. I’ve also learnt a lot of interesting background information on electronics which I found really helpful going into my electronics module this semester.
More about BlueboxNotify on Projects Page
P.S. I've saved the cross-dimensional travel functionality for Version 2.0!
The words Doctor Who and Tardis are trademarks of the British Broadcasting Corporation (BBC) since 1996.
No connection to or endorsement is given or implied to or by the BBC.
No connection to or endorsement is given or implied to or by the BBC.